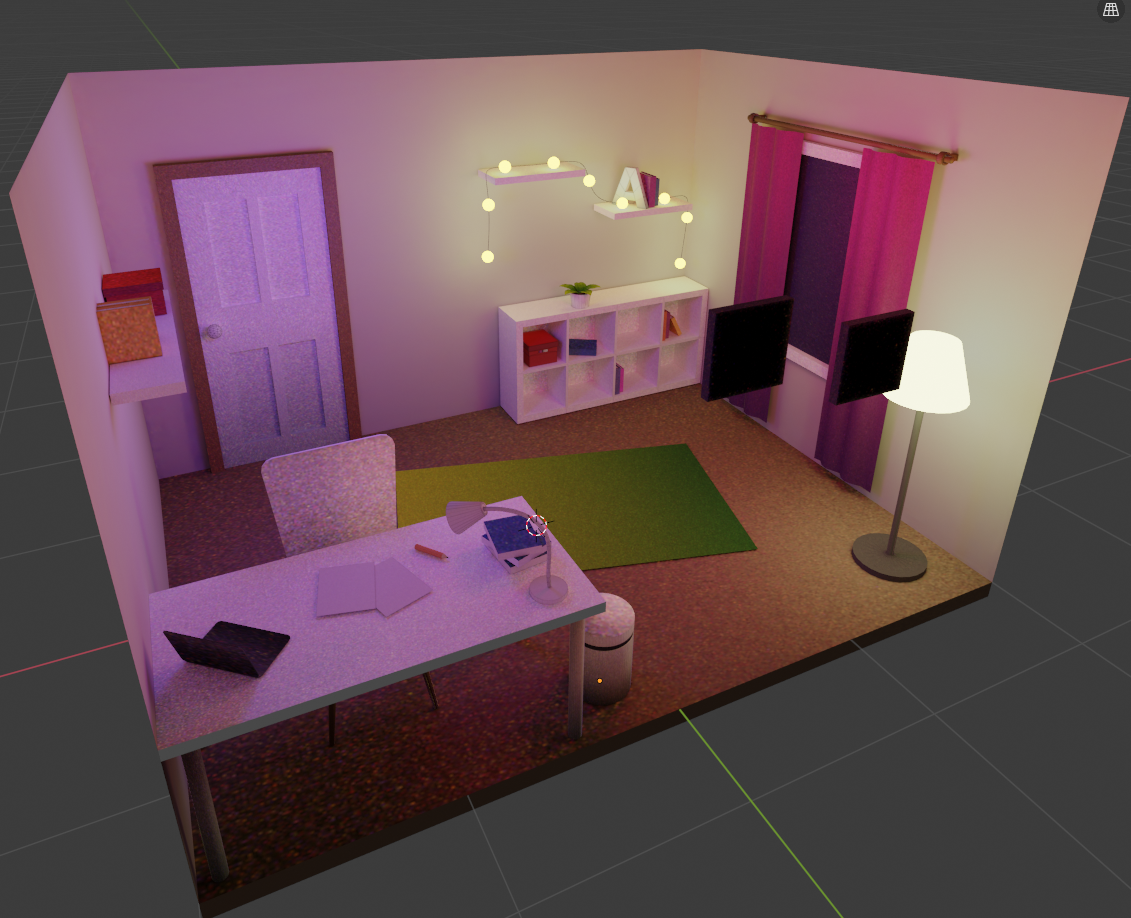
Recently a tweet from @arturitu inspired me to try light baking for making beautiful Three.js scenes and here’s a walkthrough of problems I found on my way there.
Model preparation
The workflow was similar to how I would approach a regular mid-poly scene. I didn’t want to fall into the low poly style, but also made sure that circular shapes like lamps won’t get too heavy.
Texturing
I started with solid colors, but later enhanced it with a technique called Lazy Unwrapping. It’s basically all about finding out what group of vertices should have one end of the gradient and what the other.

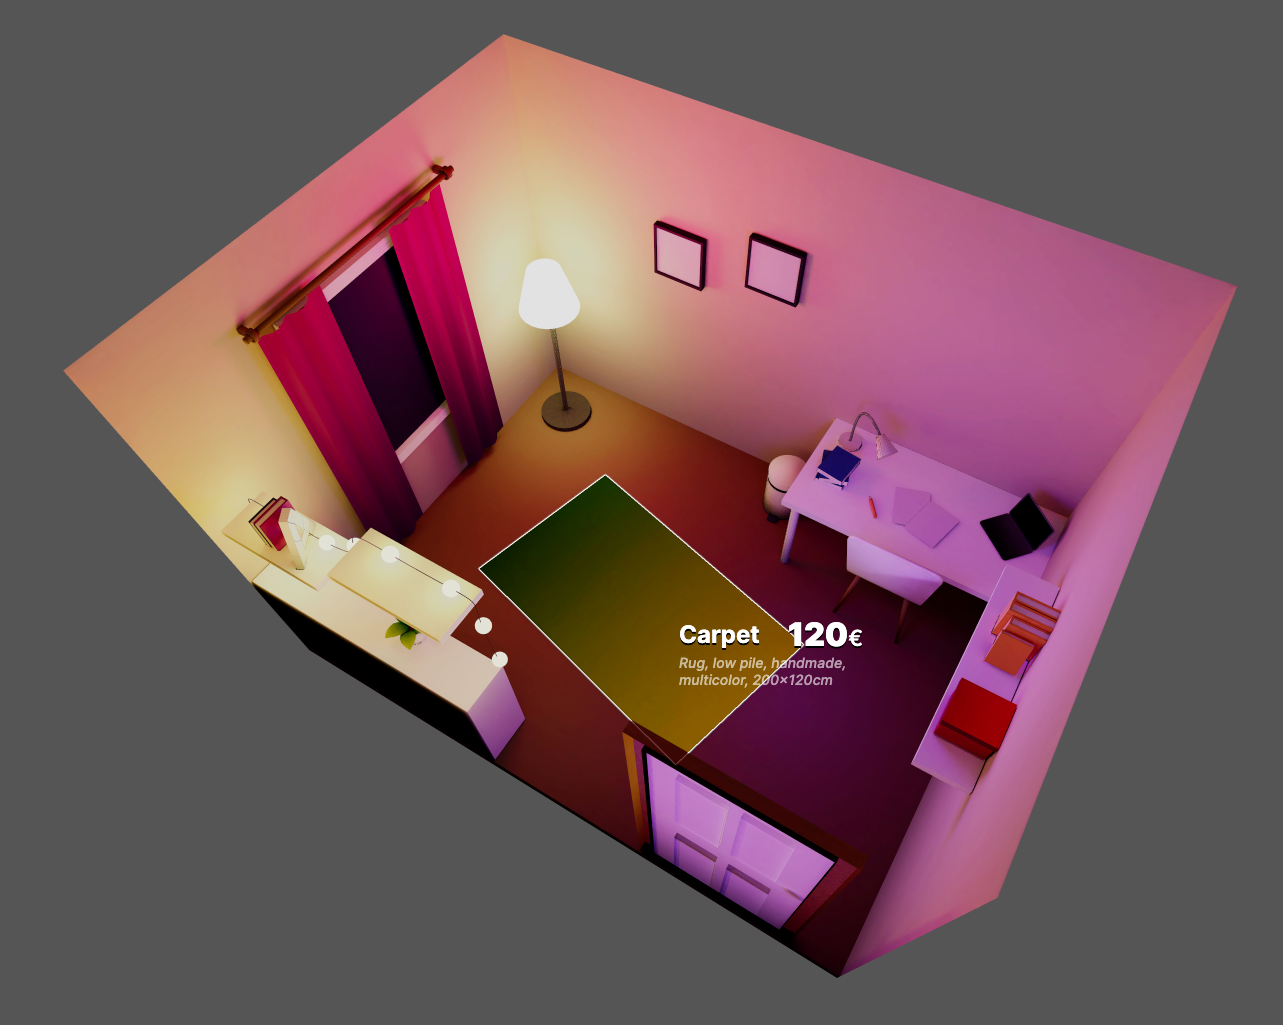
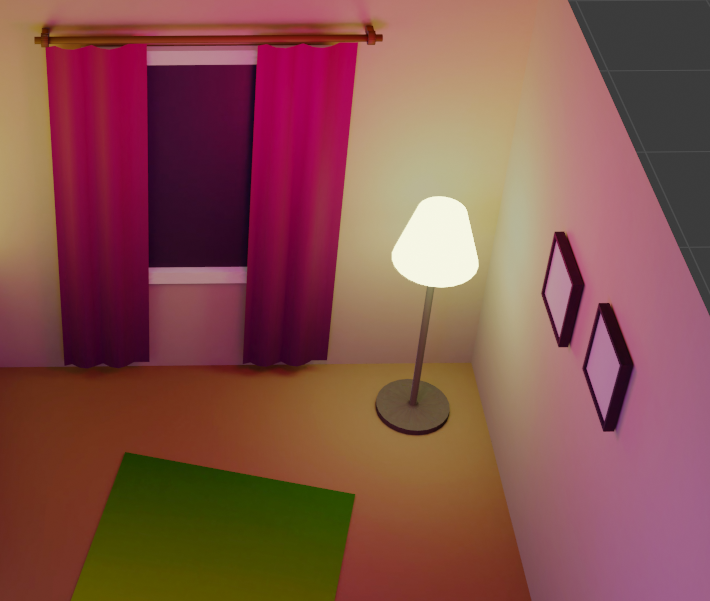
I used it to achieve interesting effects on larger surfaces like curtains and the carpet. They are also present on table legs and the bin tray, but now I think that relying on cycles lighting would be sufficient.
Curtains
I used Wave modifier as described in the How to model realistic curtains in Blender tutorial.
Making walls disappear when rotating
For this, I used the oldest and simplest trick we got for it – backface culling. I enabled it for the wall material (it turned out sufficient for the viewing while enabling it for other shapes made them look very weird from behind).
glTF and Three.js support it well, so I didn’t have to worry about it during later steps.
Curves
Using paths was important for achieving precision in some parts of the model. I used a similar technique to that presented in Pivot Desk Lamp to achieve the lamp arm.
Placing lamps along the path was trickier than just using the Curve modifier as it would deform them. What did the trick was using instancing to place several planes along the curve and then using a mesh to place them in their place while hiding them. It is well described in this tutorial.
Concerns and glTF preparations
It took me some painful trial and error when moving from having a model to having a setup that allows light baking.
I have no idea whether those steps are fully needed, but what I found particularly useful in the process was:
- Unlinking all linked objects and making them their own meshes.
- Materializing curves (like lamp arm or decoration light cables).
- Fixing normals. Blender is really forgiving in the object or even material mode about normals that go in the wrong direction. Baking is not like that in any way. Broken objects were easy to identify as they turned out black or mostly black in the rendered texture.
- I divided my scene into two collections: Lights/emission meshes and meshes.
- I went through all objects to apply scale and rotation.
What was very handy was this tip on how to turn instances to meshes which helped me with the instanced lamps.
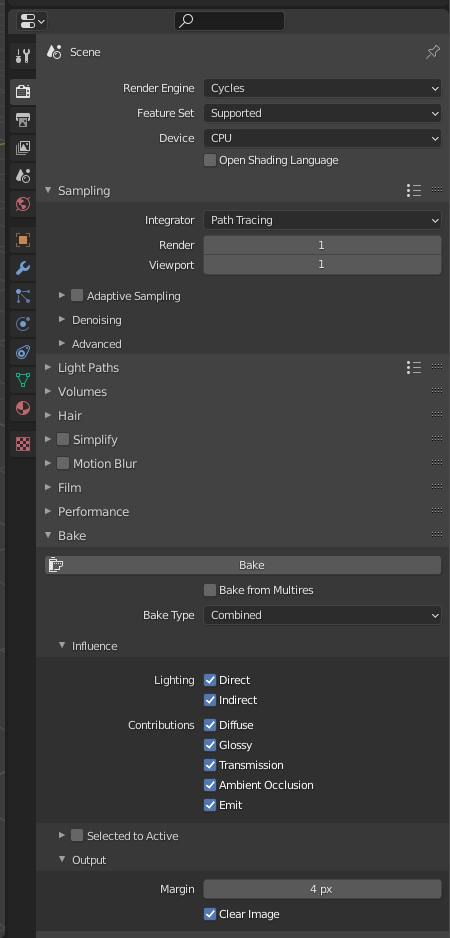
Baking light
Baking light is possible using Cycles engine. The idea is to capture ray-traced light in the textures and use them later to achieve amazing offline-quality lighting with the cost of rendering just the textured meshes (which is much less demanding on GPU).
Some people like to keep different diffuse (the colors) and lightmap (how different surfaces are lit) textures, but I used the Combined setting and included everything in one. It also allowed me to remove all materials as they served no purpose after baking.
UVs
In order to do the baking, I set each material’s UV maps in the following way (the default one is rendered, new one, Bake, is selected):

This was very tedious and repetitive work to go through all objects like this and I am looking forward to automating it with some plugin in the future.
Shaders
Create a new image (for example in the UV editor mode) of size 4096x4096 with no alpha.
In the shader editor add a new Image Texture pointing to that image. Apply for each material. Make sure that the texture node is active by pressing it (white border).
Select all relevant meshes (I use a helper collection for this as in 4. in the list above), go to edit mode, and unwrap the mesh.
I used UVPackmaster 2 for the extra quality of the UV map packing but that should not be necessary.
Test run
The most important tip for saving time and avoiding frustration I can give based on my experience is to do a test run of the baking. This is a very wild and unintuitive (at least in the beginning) procedure and sometimes required unexplained restarts of Blender for some things to start working.
Also test run is the place to find out about all issues in the meshes and the moment when incorrect normals show up as black texture parts.
I suggest going for the lowest quality of 1 sample and maybe even a smaller image like 512x512 to first try how it looks like.
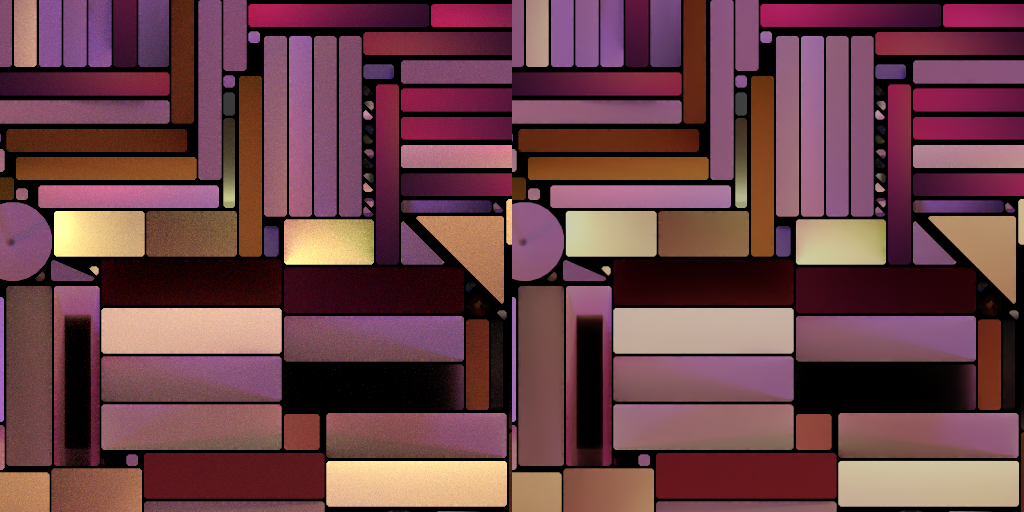
You can also try increasing the sampling rate a bit (for example to 10) to evaluate the quality of textures on different objects. I experienced poor quality of floor and some objects like bin tray or chair. I mitigated it by scaling up their UV faces and recalculating the UV pack.
The image below shows not only noise but also very inconsistent resolution that was calculated for different meshes by the UV unwrapping.
I also managed to reclaim some texture space by scaling down shapes invisible to the viewer like the bottom side of the table, chair or floor.
Final image and postprocessing
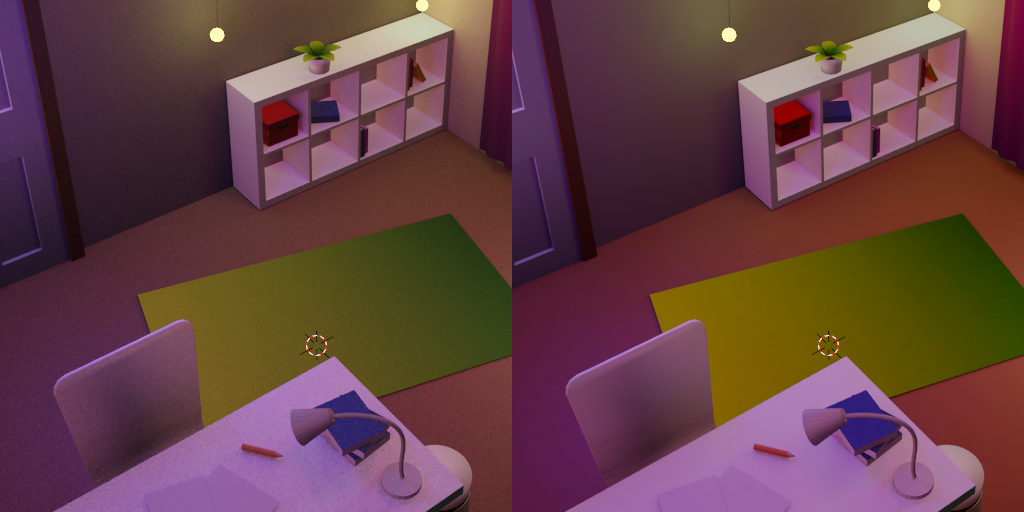
For the final lightmap I used 4096x4096 texture with 4px margins (that value seems too low now as there is noticeable bleeding of black background on door handle, desk lamp arm and bookcase) and 128 samples.
Invaluable help came from this denoising trick that drastically improved the quality of the texture. It came with a cost of calmer and colder lights that I mitigated by postprocessing the texture in GIMP. In the future I will try to stick to Blender node compositor to make it replicable.
This is how the whole scene looks with freshly baked texture vs how it looks after denoising and some color grading postprocessing.
Three.js setup
For moving the scene to Three.js I used npx gltfjsx command to generate a react-three-fiber scene definition. Then I did a basic canvas setup:
<Canvas concurrent pixelRatio={[1, 2]} camera={{ position: [0, 4, 4] }}>
  <Stats />
  <ambientLight />
  <OrbitControls enableZoom={false} />
  <Suspense
    fallback={
      <Html>
        <div>Loading...</div>
      </Html>
    }
  >
    <Scene />
  </Suspense>
</Canvas>
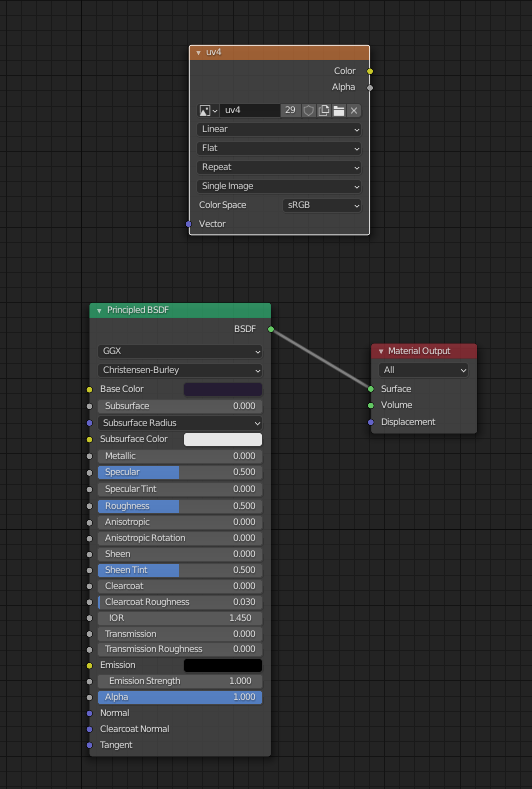
When exporting *.glb file, I had to stick to the default Principled BSDF node with texture applied and then I had to make sure I am not exporting vertex colors. Otherwise, material configuration would lead to black mesh instead of the expected texture.
Outline on hover
I will update it here once I get a good enough performance on it. WIP.
Conclusion
The effect is surprisingly powerful. Baked lighting creates amazing and mostly lightweight to render scenes. In the end, I can join all meshes in the scene into one (I am not doing it for the hover effects that I am exploring though).
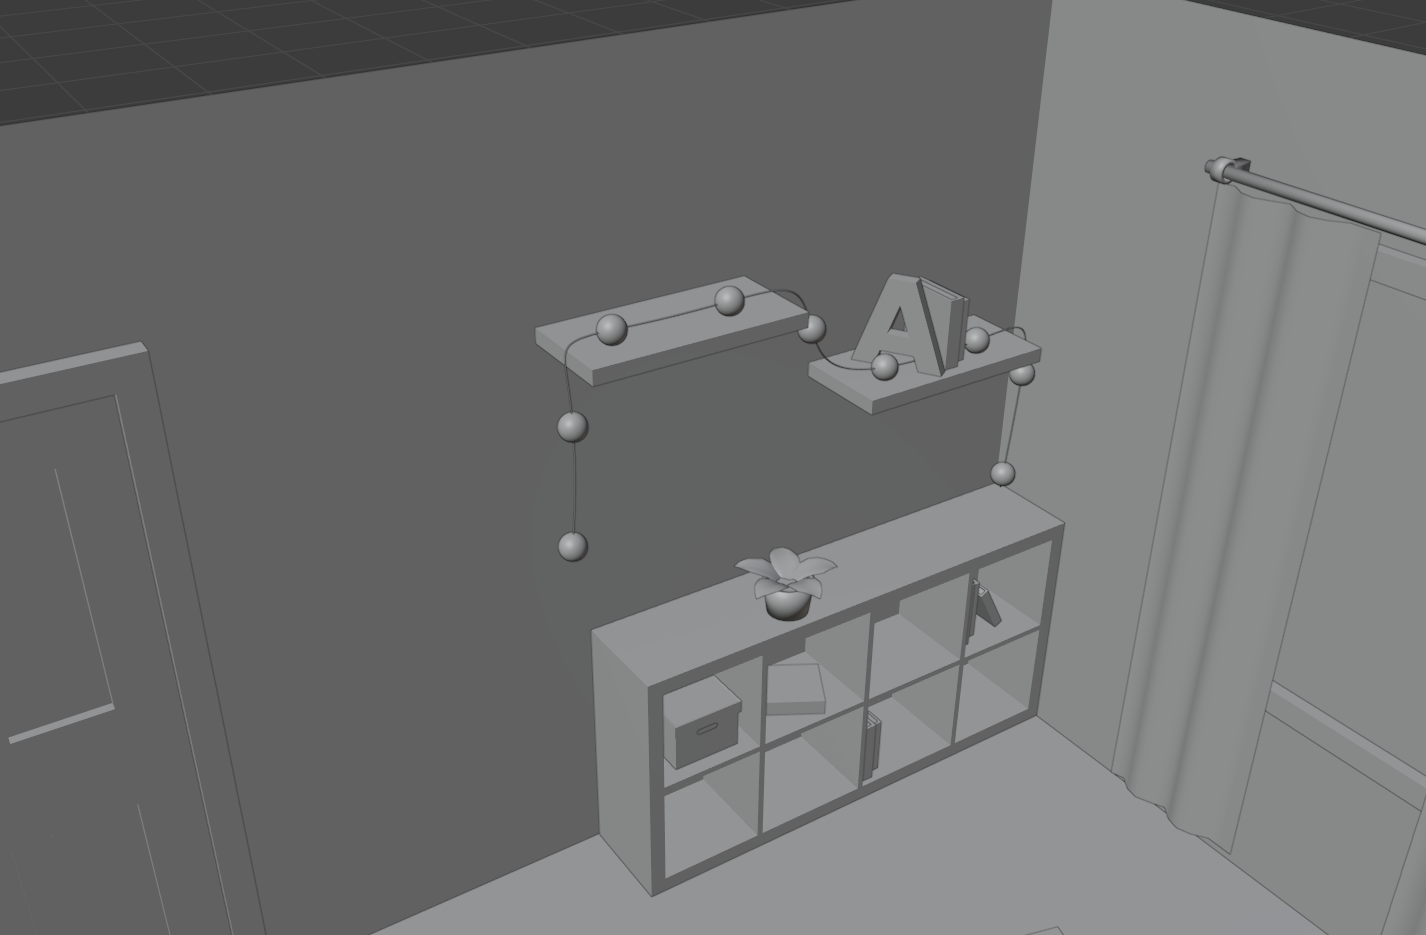
This technique comes with some limitations. In my case, no object can move because the shadow it casts is baked into the textures of surrounding objects. As you can see, the red box on the shelf must stay there forever:
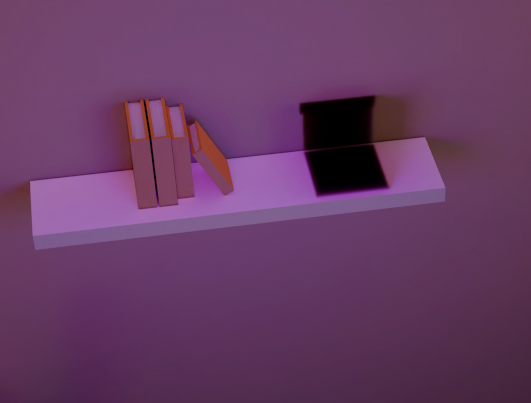
Is it a bad thing though? Absolutely not! I didn’t plan to move any of my objects so this is perfectly fine for me and the added quality comes with no disadvantages. But it should be considered that it’s not always the case.
Playable example
Next steps
Even though this scene will remain mostly static, it doesn’t mean there’s no way to go from here. I started by adding a hover outline effect (as seen in the first screenshot) and I am currently working on optimizing that.
From there it can go either in direction of some interactive storytelling/RPG game or become a furniture shop website (IKEA experience of the future). In that case, AR might come in handy to allow the user to try out a carpet in their own room. And in both cases, VR will be a nice addition.